Showing posts with label Top Note Bigz Die. Show all posts

Sunday, January 29, 2012

Enchanted Elegance for OWH

Wow ... feels great to slowly be reentering the land of the human beings ... spent the past week trying to keep a nasty cold that has been going around at bay and well some days it felt like I was loosing the battle but this morning I am feeling like I might have finally won the war and carved out some time to blog before I have to tackle the weekend chores while I have the energy to!

So so excited that Sale-a-bration formally started this week and the catalog this year is full of some wonderful treasures for us and are now available to customers with every $60 purchase! 

This card features Everyday Enchanted Designer Series Paper, the Enchanted Ribbon and Brad collection and the stamp set Elementary Elegance all FREE from Sale-a-bration catalog!
I used this Sketch Challenge from over at Operation Write Home for my layout inspiration incorporating the Top Note die and using the Pretty Postage punch instead of squares and a the 1 1/4 inch squares behind instead of a larger strip ... t his is the great thing about sketches as you can follow exactly or use them as a jumping point  ... hop on over and check out the other awesome entries and see how you get inspired!

Happy Stampin
Margaret


Sunday, October 30, 2011

Trick or Treat Characters

How stinking cute are these guys? 

I have seen variations of these little guys all over the net and thought they would be so fun with the kiddies for their Halloween bags - cause they can eat the legs but still have the body as finger puppets cause I left a hole between the front layer and back layer of the characters and well not to be totally selfish in my Trick or Treating but I stamped my contract info on the back of the puppets should any parents out there want to learn more about paper crafting and Stampin' Up as well as there is room for a business card for my home childcare should any be looking for childcare - so win win ;)

So we have Jack, Mummy and Frank here ...


Meet Jack ... he features the Top Note die in Pumpkin Pie which I scored using our new scoring tool and than folded to give a 3D effect by sponging the creases with Pumpkin ink. I used the Pennant builder punch to quickly punch my triangles as well as to create his smile. The Two Step Bird punch made great vines on the top with some scraps of Green glitter paper from my non-stamping stash ... sure how they keep adding new colors to our line cause I love our quality better ;)

Jack's legs are created with our new cellophane bags from the Holiday mini and were stuffed with some Jelly Belly black and orange beans - yummy!


Meet Mummy ... looking dapper in Very Vanilla which was torn to create his bandages look and sponged with some Soft Suede ink to give him that worn look ... eyes and a dazzling detail smile create the look. His cellophane legs are stuffed with some purple candy corn - which for some reason decided to be a little challenging going in - not sure if it is the triangle shape or what -  so while Mummy was quick to put together his legs were a bit of a pita so only a few of him were created!

 Meet Frank ... unlike Dr Frankenstein's experience Frank was actually the quickest and easiest to make so there are more of his friends in the treat collection ;)

Frank features one Always Artichoke Top Note and one Basic Black Top Note which was cut in half width wise and used to create his hair and the back panel of the finger puppet and hide the leg attachment! 

Now just punch some eyes and lids with the circle punch add a little Always Artichoke sponging and draw a smile and a scar and put some Twizzlers in a cellophane bag for legs which slide in nice and easy and Frank is good to go!!


Happy Halloween 
Margaret

Friday, October 7, 2011

A La Card Monkey Challenge 77

I am so very excited to be chosen to be an A La Monkey Guest Designer this week ...  click the Monkey to check out my card that was honored over there and see all the wonderful cards that other followers shared!


So this weeks Monkey Challenge #77 was to use the following sketch and leaves as inspiration in making a card ...


And here is the card that I was inspired to make and offer up as Guest Designer this week .... the leaves are really starting to turn here in London and I was inspired to use some of the colors I am seeing everyday while out and about enjoying the Fall weather with the kids!


My card features the Stampin' Up  French Foliage stamp set with the colors of More Mustard, Cajun Craze, Elegant Eggplant and Always Artichoke with Vanilla accents.

The smaller leave in the Foliage set makes a wonderful floral accent which reminds me of a poinsettia and the Basic Pearls are perfect addition to the middle ... so this card is a tribute to fall with a foreshadowing of the Winter ahead!
 No handmade card is complete without a matching inner place to write your handwritten sentiment ... I am going to use this one as a thank you to a special someone who has gone above and beyond in supporting me this month!

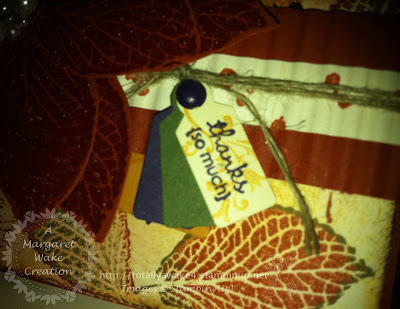
A close up of some cool texture incorporated into the card in case you missed it in the overshot photo ... I used a piece of Cajun Craze with a strip of Very Vanilla to create a 'ribbon'. I stamped the Vanilla strip with the water spots stamp from French Foliage in the Cajun Craze and ran it through the crimper. It still needed something so I than added some additional hemp thread wrapped around and using a brad attached the sentiment from the Tiny Tags stamp set which I punched with the Jewellery punch.

 You can see a little bit in the photo below how the card all coordinates with the outside, inside note and envelope all stamped!


Happy Stampin'
Margaret

Tuesday, August 9, 2011

Playing withButton Buddies

 Having fun with my new Button Buddies stamp set and showcasing our wonderful DSP that is on sale this month buy 3 get 1 free!

This card color combo is Not Quite Navy, Baja Breeze with Naturals White and features DSP from the Pocketful of Posies package.

I created my own designer paper to tie in the Pocketful of Posies DSP with the stamp set I was using by stamping the floral image in Baja Breeze around the Top Note frame...I popped the frame up on dimensionals and love the effect it gives!

I also used the Perfect Pennants Die for the floral accent piece and hand cut the Button Buddies floral image and finished it off with a Very Vanilla button accent tied with some linen thread! 

This card design was also inspired by the OWH sketch which was lots of fun to play along and I am looking forward to making my first attempt at donating some of my cards to this Fall if I can just figure out the rules for the shipping! You can also find out more about Operation Write Home on their Facebook page.


Happy Stampin'

Sunday, August 7, 2011

Colour Q #96

This card color combo was inspired by this weeks Colour Q challenge .... unfortunately I did not get my act together in time to submit it ... I got distracted by some rather yummy naughty smoothies this weekend ... but love the colour combination! 

So inspired by the colour combination I went in search of a stamp set that matched the inspiration and came up with the new Up Up and Away stamp set ... I used my brayer on Whisper White paper to make a Bashful Blue sky and Lucky Limeade green space which was versamarked with Pocket Silhouette stamp for texture.
The Up Up and Away balloons were done in two ways - the middle balloon is versamarked and heat embossed with the Tempting Turquoise and that two balloons on the side are done with the Stamp Write Markers to allow for two tone balloons in Bashful Blue and Tempting Turquoise. 
 
The clouds, birds and baskets are in Basic Gray with a little Tangerine Tango thrown in for the sun. 
 
Happy Stampin' 

Friday, August 5, 2011

Just Believe in Recycling ...

This was another quick and easy card I made the other day as I was going through my scraps and realized that I had lots of these 'Top Note Frames' in my scraps from when I cut out the Top Note for other uses but did not want to waste the paper.

So here we have a Not Quite Navy card base with a Naturals White Top Note Frame which I paper pierced on the corners to give it some character and than used it to frame a White Embossed Just Believe stamped image and than using my Versamarker I added some Melon Mambo embossing powder to just the flowers and the Thank you sentiment....and that is how a scrap of paper gets recycled into a beautiful Thank You card!

Happy Stampin'!

Sunday, February 6, 2011

ScrapSketch17

This week I was inspired to use my FREE Sale-a-bration CD for My Digital Studio ... which has all the wonderful downloads from the Sale-a-bration catalog ... over at the My Digital Studio site to rise to the Scrapsketch17 challenge.

Here is Alesha's Challenge ...

And here is my inspiration ... featuring the Sale-a-bration DSP Ice Cream Parlor and coordinating ribbon and buttons. Also the wonderful beautiful Bliss stamp brush set! which co-ordinates nicely with the Boho Blossom punch set flower to give layering to the flower in the Bliss stamp set.

And of course a little bling with some Pearl accents
.


Thursday, February 3, 2011

Sketchy Thursday 1.

This week I tried a different scrapbook challenge over on Sketchy Thursdays which offers up both traditional scrapbooking AND digital scrapbooking inspirations which I thought was neat!

This layout features my Grandpa's 90th birthday party ... he has since passed on to peaceful adventures on other plains and is greatly missed! This layout allowed me to trying out the new Botanical Gardens Designer series Paper and the Build a Cupcake punch... which are currently available in the Occasions mini for traditional paper crafting AND as a My Digital Studio download! Plus they have finally rolled out the Top Note in a My Digital Studio download!

In case you cannot tell ... that skinny thing sitting on the end chair beside my Grandpa is ME just preparing to turn 30 ... oh those were the days - hard to believe that was almost 11 years ago!!!

Saturday, November 6, 2010

Subtle Seasons Greeting

This is another card shared at our recent card swap ... my team member Nancy shared this one showcasing some cool layering options with the Top Note over a polka dot background created with our Stampin' Up! Stamped in Marina Mist with the Scenic Seasons stamp set ... this is such a subtle and soft Seasons Greeting!

Thursday, October 7, 2010

More Alligator Purses

Here are a few more purses I created for my friend Shannon - who sells Scentsy Candles! Check them out they are totally amazing product great for people with kids or pets cause they are 'flame-less'!

These little purses are just so much fun and this time I was able to incorporate her logo into the card design for her and do some Razzleberry purses as well as Certainly Celery! I also got a new Stampin' Around Stars Wheel which made a great design on the purses as well - so some are with the Star Wheel and some are decorated with the Canada Day stamp set stars!


Sunday, September 12, 2010

Lady with an Alligator Purse

Today I was having fun brainstorming a request to make a pocket envelope card or bag for a friends business. She wanted something simple to hold a few business related items for customers!

I had been dying to try out this embossing technique and figured - what can be more fun than making an alligator purse and wouldn't it be a cute little 'gift' for her customers!

The first one is a plain purse highlighted with the faux alligator skin top and the 5 petal flower punch accented with a Star from the Stars Die Cut and a little brad as the 'clasp' holding the purse closed. However this one just felt like something was 'missing'.

So I added a little texture with a little bit of Versamark and the little Stars from the Canada Day Stamp set....this ties the purses in with her Thank you card theme.

Here is a side view of the purse with a little accordion style side that will allow a few small objects to be placed inside the purse for sharing with customers.

I also tweaked the inside of the Thank you card design to allow for the adding of a business card or customer appreciation gift card.


Hope she likes them!

Friday, July 23, 2010

Back to the Garden again

More fun with the Cottage Garden stamp set and the in colours! Tangerine Tango, Daffodil Delight and Pear Pizazz with the Early Espresso ink for stamping and shading!

I love the butterfly fluttering off the page technique as well!

Friday, July 16, 2010

Black Magic ... under my spell

This technique is totally cool ... called Black Magic with a twist and is a combination of using white ink on a dark background and than colouring with Stampin Up Water colour pencils and a white gel pen for that extra magic pop factor!

The first card features the Watercolour Trio stamp set in the 2010 Summer mini catalog, the Top Note Bigz die and the scallop trim punch ... awesome combination inspired by Liz Goldhawk my up line mentor!

This section card is from the new catalog called Just Believe and is a cute little set!

Tuesday, June 15, 2010

Plenty of Pansies!

This spring I planted a Pansie garden with the daycare kids and was totally inspired by their colors as they bloomed this past week that I wanted to create a card in their honor.

So off to Google I went to see if there were any Stampin' Up! techniques already out there inspired by pansies ... cause why recreate the wheel if someone else has already done it ... so as I was online in came an email from my up line mentor Liz Goldhawk with her upcoming technique class - and I couldn't believe my eyes ... she was featuring Pansies!

So once again karma answered my call and brought me what I needed into my life!

So after attending the class I came home to work on the following with my original Pansie inspirations!

A Cajun Craze and Daffodil Delight Inspired Colour Combo:


A Concord Crush and Daffodil Delight combination:

A Night of Navy, Brocade Blue and Daffodil Delight inspiration:

And a wonderful Real Red and Daffodil Delight creation:
I am so totally in love with this Pansie technique ... while some of the youtube videos I Googled showed the use of the re-inkers and involved soaking the paper and well 'mess' plus way more time in waiting for the Pansie's to dry before you can assemble ... this one used sponging and allows for much more control of ink placement and colour blending ... and well anyone who knows me knows that I totally prefer the control!

This technique is sure to become a favorite of mine ... I am excited to combine it with some fairy cards and butterfly cards cause well it is just so 'magical' creating them ... no two are the same!